
The least successful variant of the Zero, the Hamp also may have had one of the most confusing designations!

After the jump, a look at the first major upgrade of Mitsubishi’s legendary fighter.
The development of the Zero, like many other types that saw long service, can get pretty convoluted at times. I’ll try to keep this simple; I apologize in advance if it is still boring, or if my simplification goes awry!

The model of Zero in service at the start of World War II used a Nakajima Sakae 12 engine with about 900 HP. When a new version of that engine, the Sakae 21, came available in 1941 it delivered about 1100 HP and a two-stage supercharger for better high altitude performance. Work started immediately to adapt it to the successful A6M Zero. Because the engine was slightly larger and consumed more fuel, the decision to reduce the size of the fuselage fuel tank (to accommodate the bigger engine) led to a loss of 500 miles of range.

The wing was also redesigned; the tips had previously flipped up to allow a better fit on aircraft carrier elevators. On the new Zero the tips were eliminated. This led to a distinct squared shape, an increase in speed and rate of roll, but a decrease in rate of turn.
All these changes were not popular with pilots. Japanese tactics stressed maneuverability, and deployment meant to take advantage of the type’s incredible range. The changes reduced some of the type’s disadvantages against western fighters; but they also reduced the type’s advantages.

So as a fix, the wing shape from the earlier model Zero was restored along with increased fuel capacity on the wing tanks. This satisfied most pilots and late build A6M3 Zeros proved to be very popular mounts.

But this all led to an interesting quirk in the designation system. The primary Zero in service at the start of the war was the A6M2 Model 21. The upgrade was the A6M3 Model 32. With Japanese designations the “Model” is read as two digits; that is, “Model Two-One” became the “Model Three-Two”. This indicates the third wing design and second engine. Because of the unpopularity of the new wing, the redesign with the original profile was the “Model Two-Two”. That means the Model 32 entered service first, and after about 500 were built it was replaced by the Model 22. If you think that sounds confusing, just imagine the Allied Intelligence guys trying to figure out what these designations meant! (For more read “What’s in a Name – Japan“).
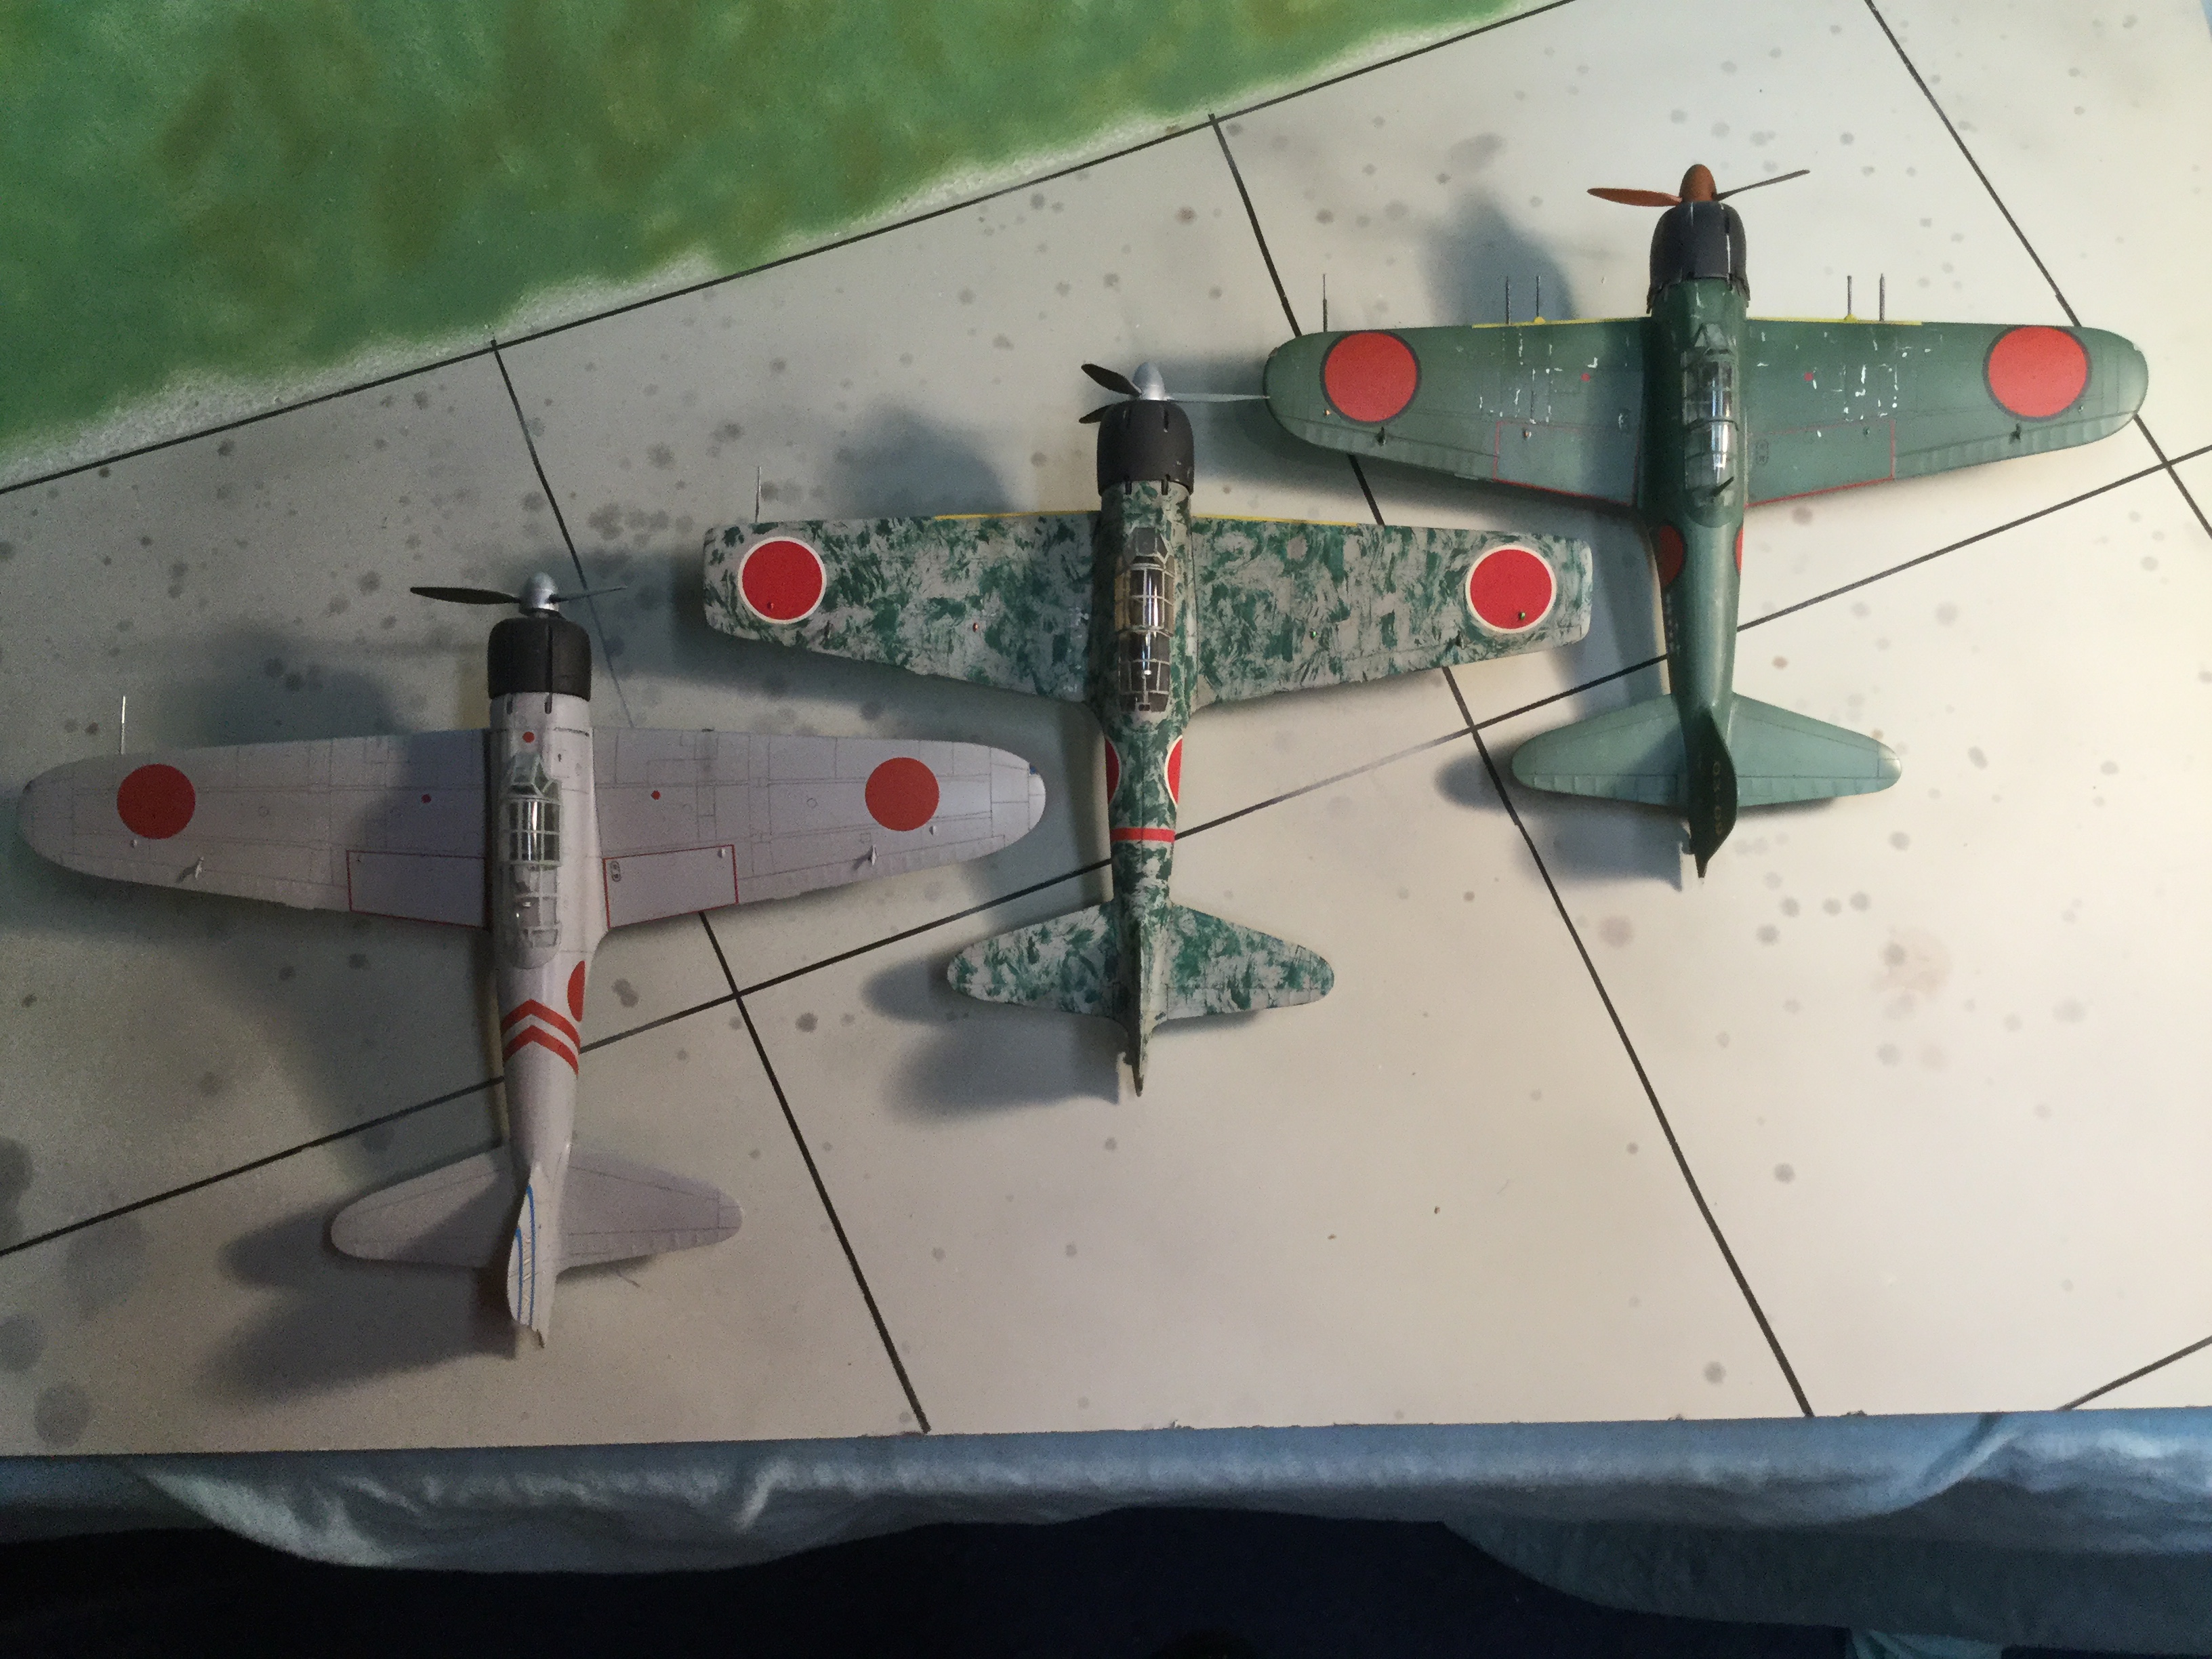
This overhead shows three major types of Zero. The A6M2 Model 21 is on the left (a model 11 was built in small numbers with the same wing shape, but no folding tips).
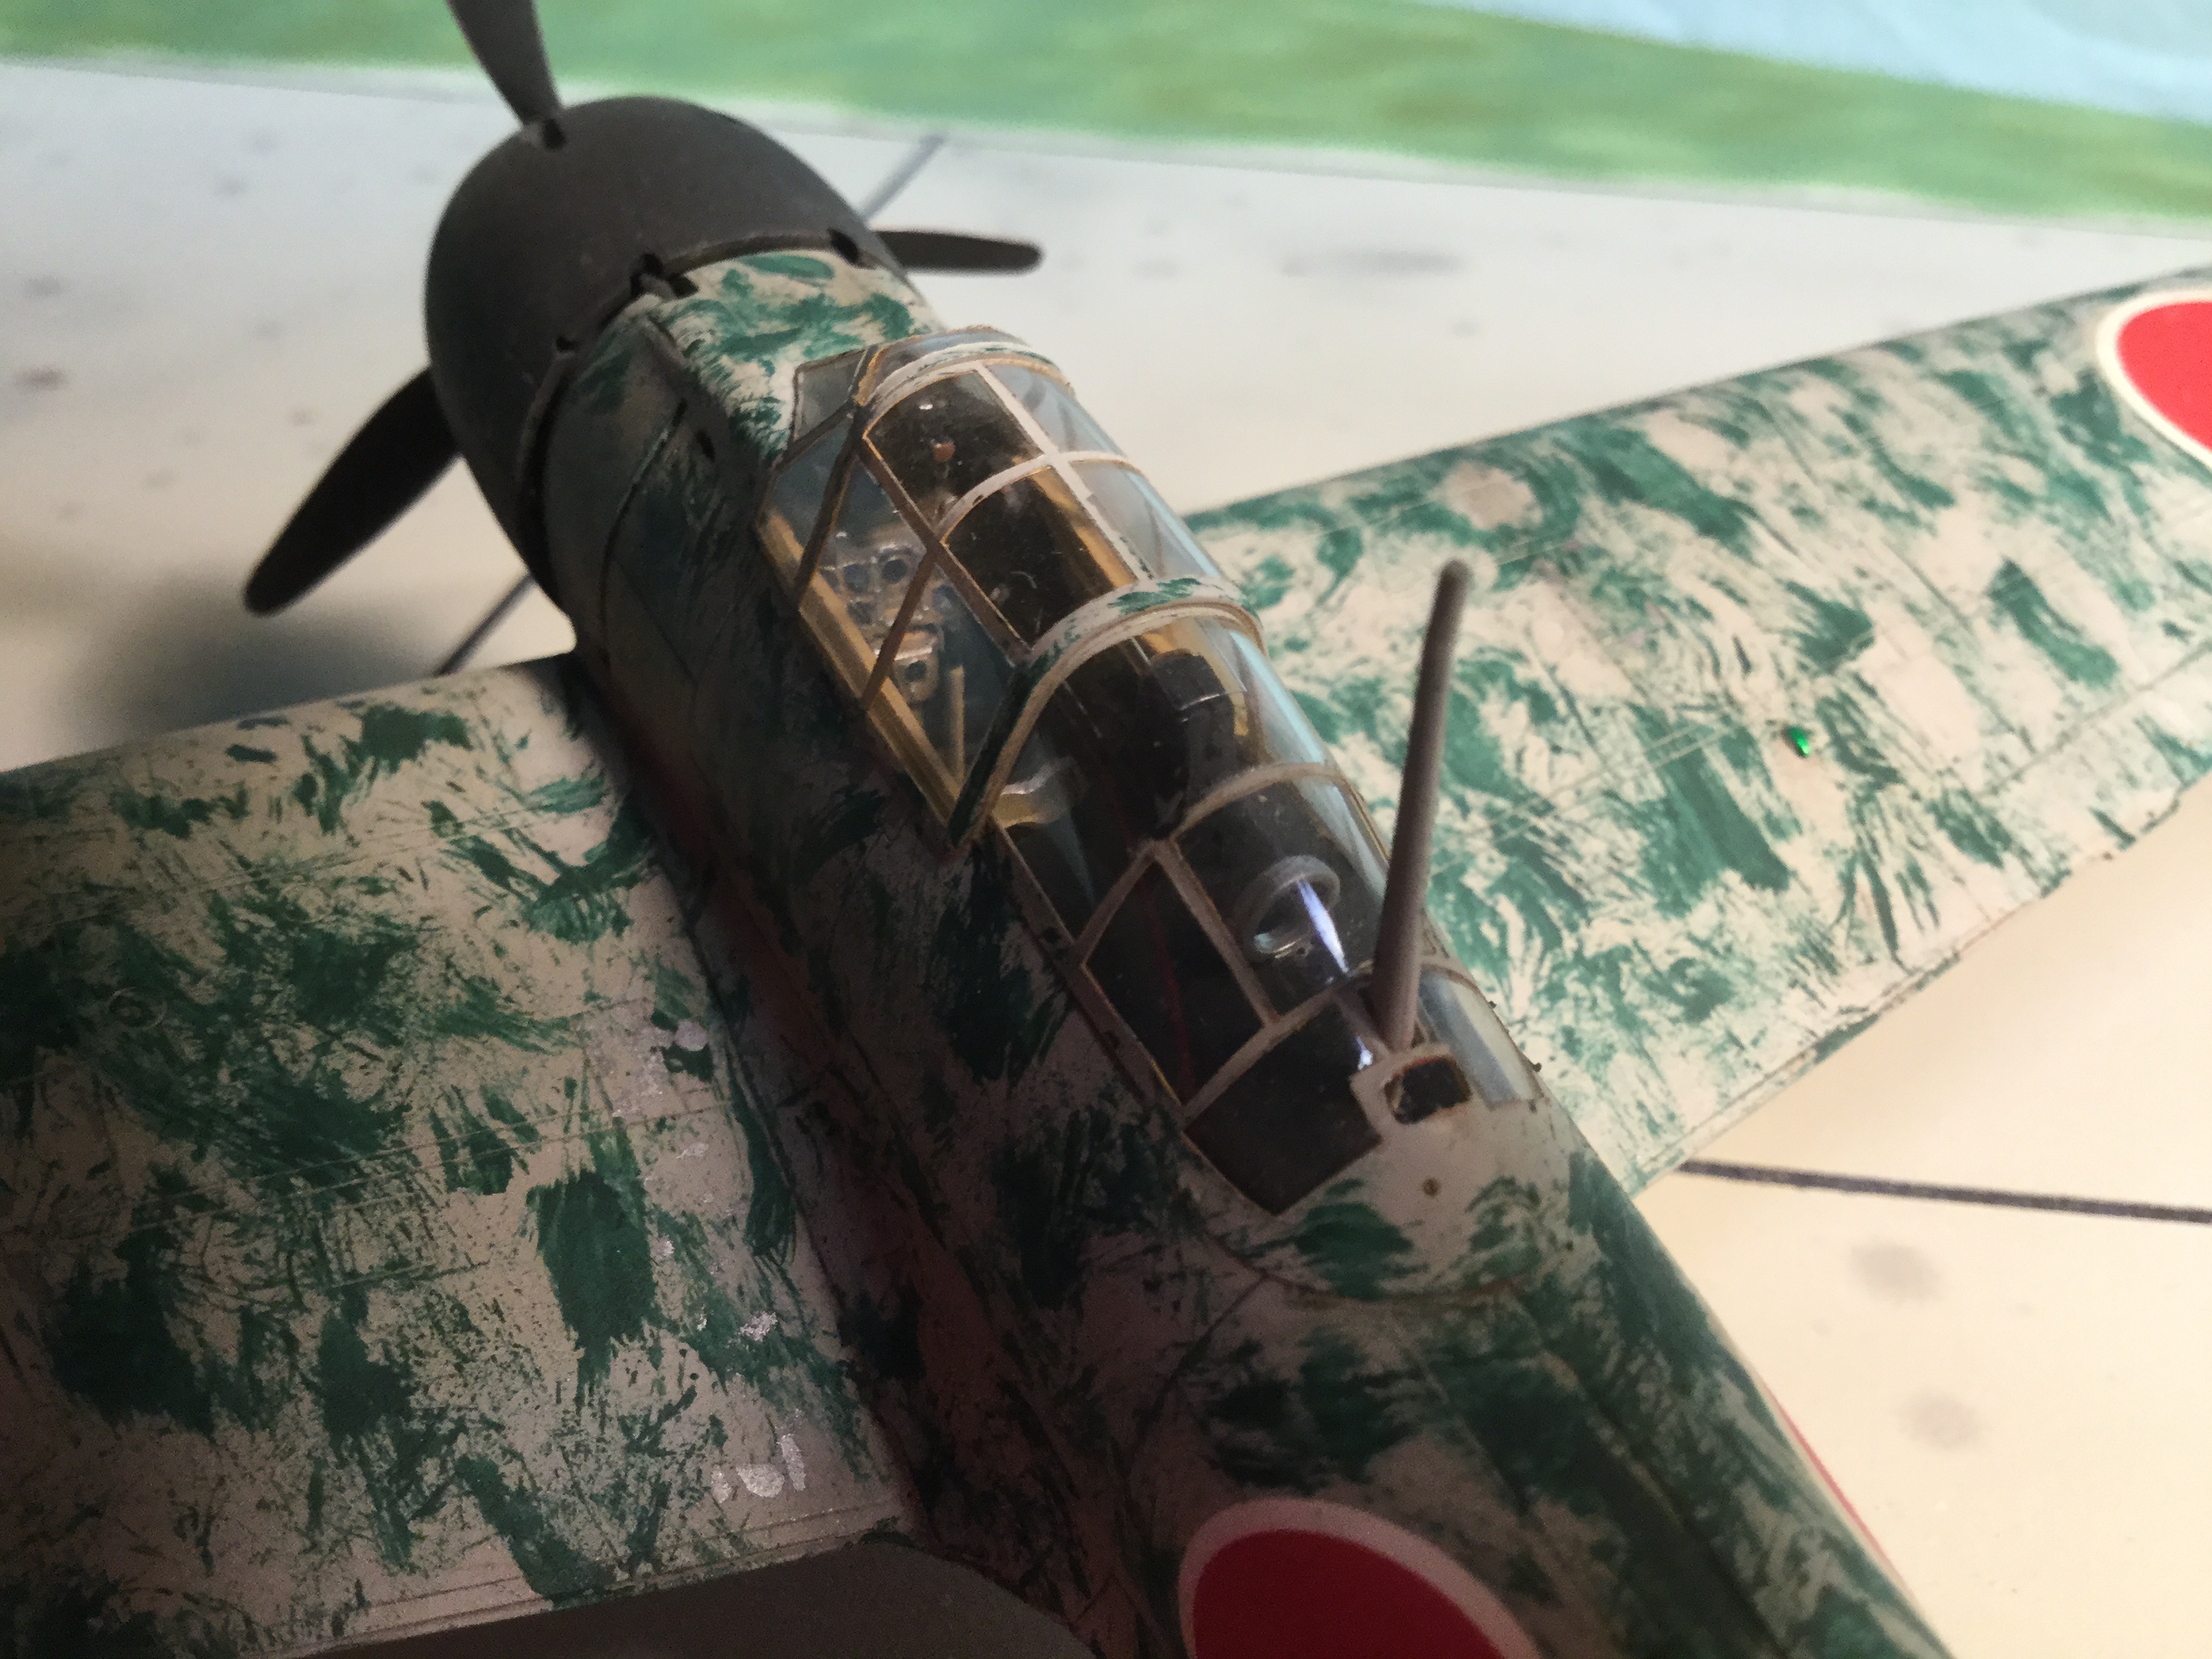
The A6M3 Model 32 shows the new squared tips, and the enlarged engine. Also, the 20 mm cannon in the wings were an improved type with a better rate of fire.
The A6M5 Model 52c right is the final major version. The wing has the same span as the Model 32 but the tips have been rounded. It also has an even more improved 20 mm cannon and a heavy machine gun in each wing. But it still uses the same engine.
When these square winged Zeros first showed up in combat, intelligence assumed it was a new type. The type/naming system had been in use for a while with the original Zero known as a “Zeke”. This new type was named in honor of the head of the Army Air Force General “Hap” Arnold. But “Hap” didn’t last long as a new name, General Arnold was not amused and the name was switched to “Hamp”. This may be the name this sub-type is best known by; but officially, when intelligence learned a few months later exactly what this new fighter was, its designation was changed again to “Zeke 32”.
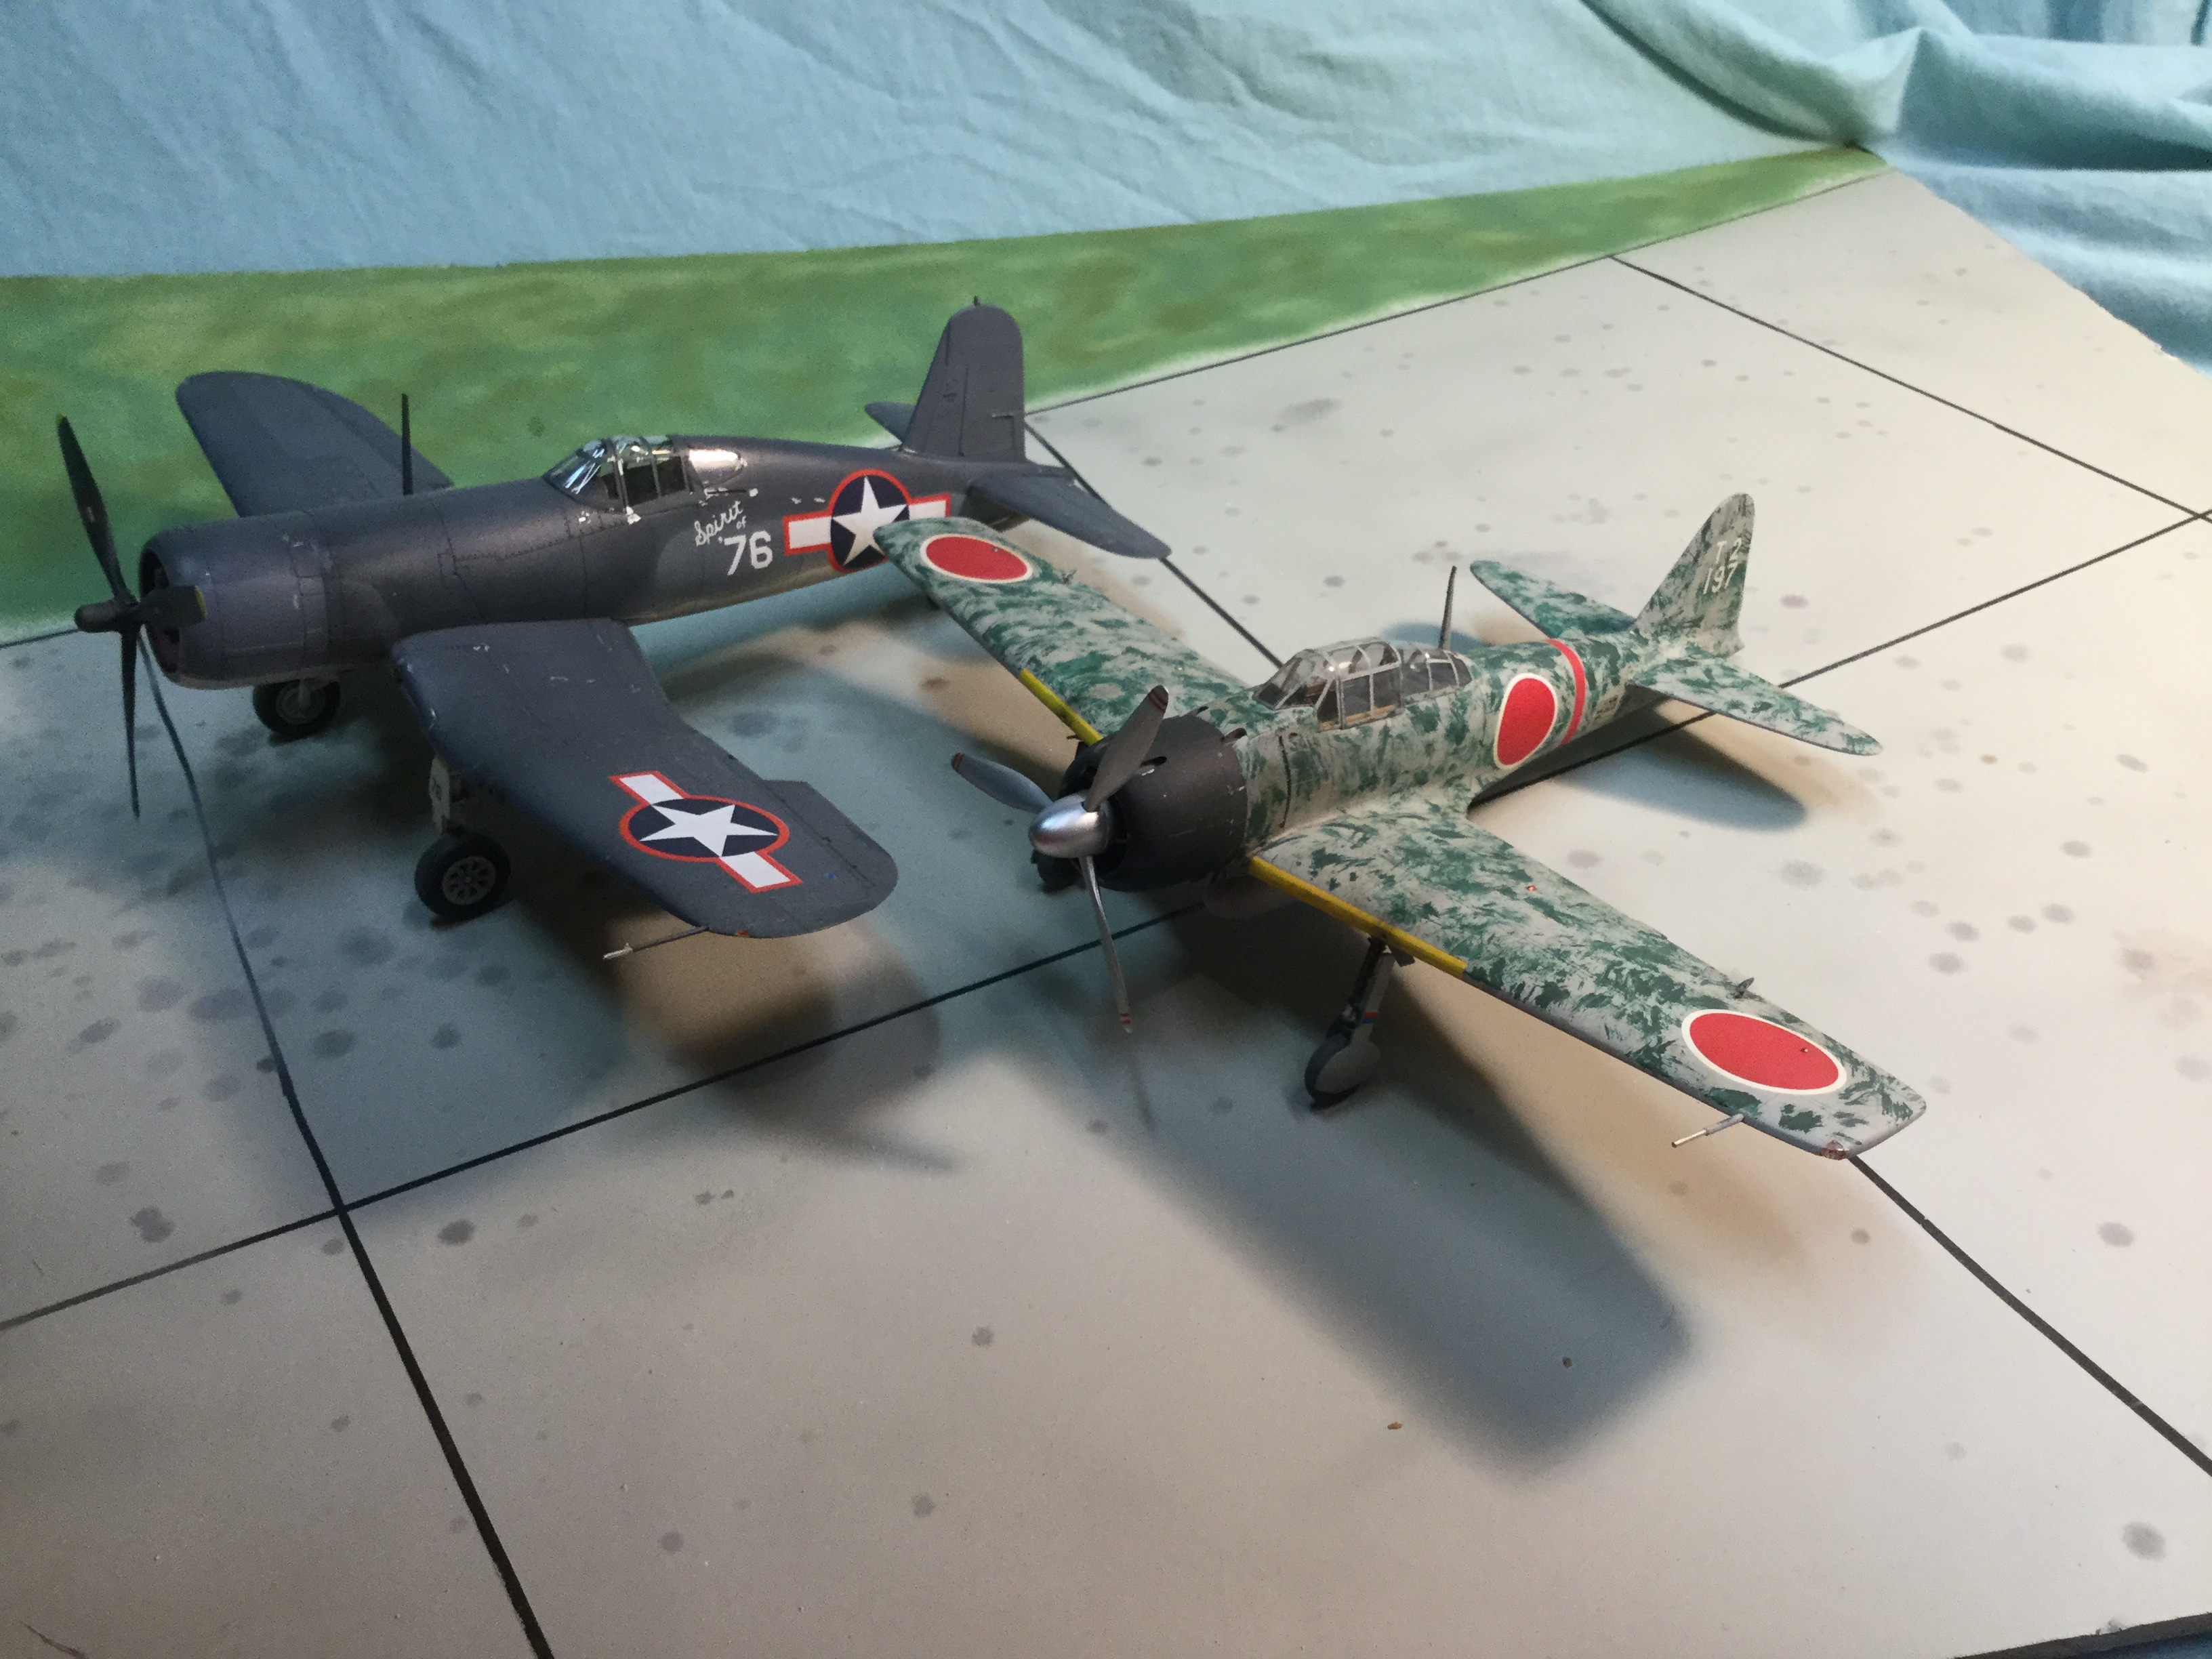
The A6M3 did offer improved air to air capabilities. But in early 1943 it started encountering much improved allied types like this F4U-1 Corsair.
The allied improvements completely out-stripped the Japanese improvements.
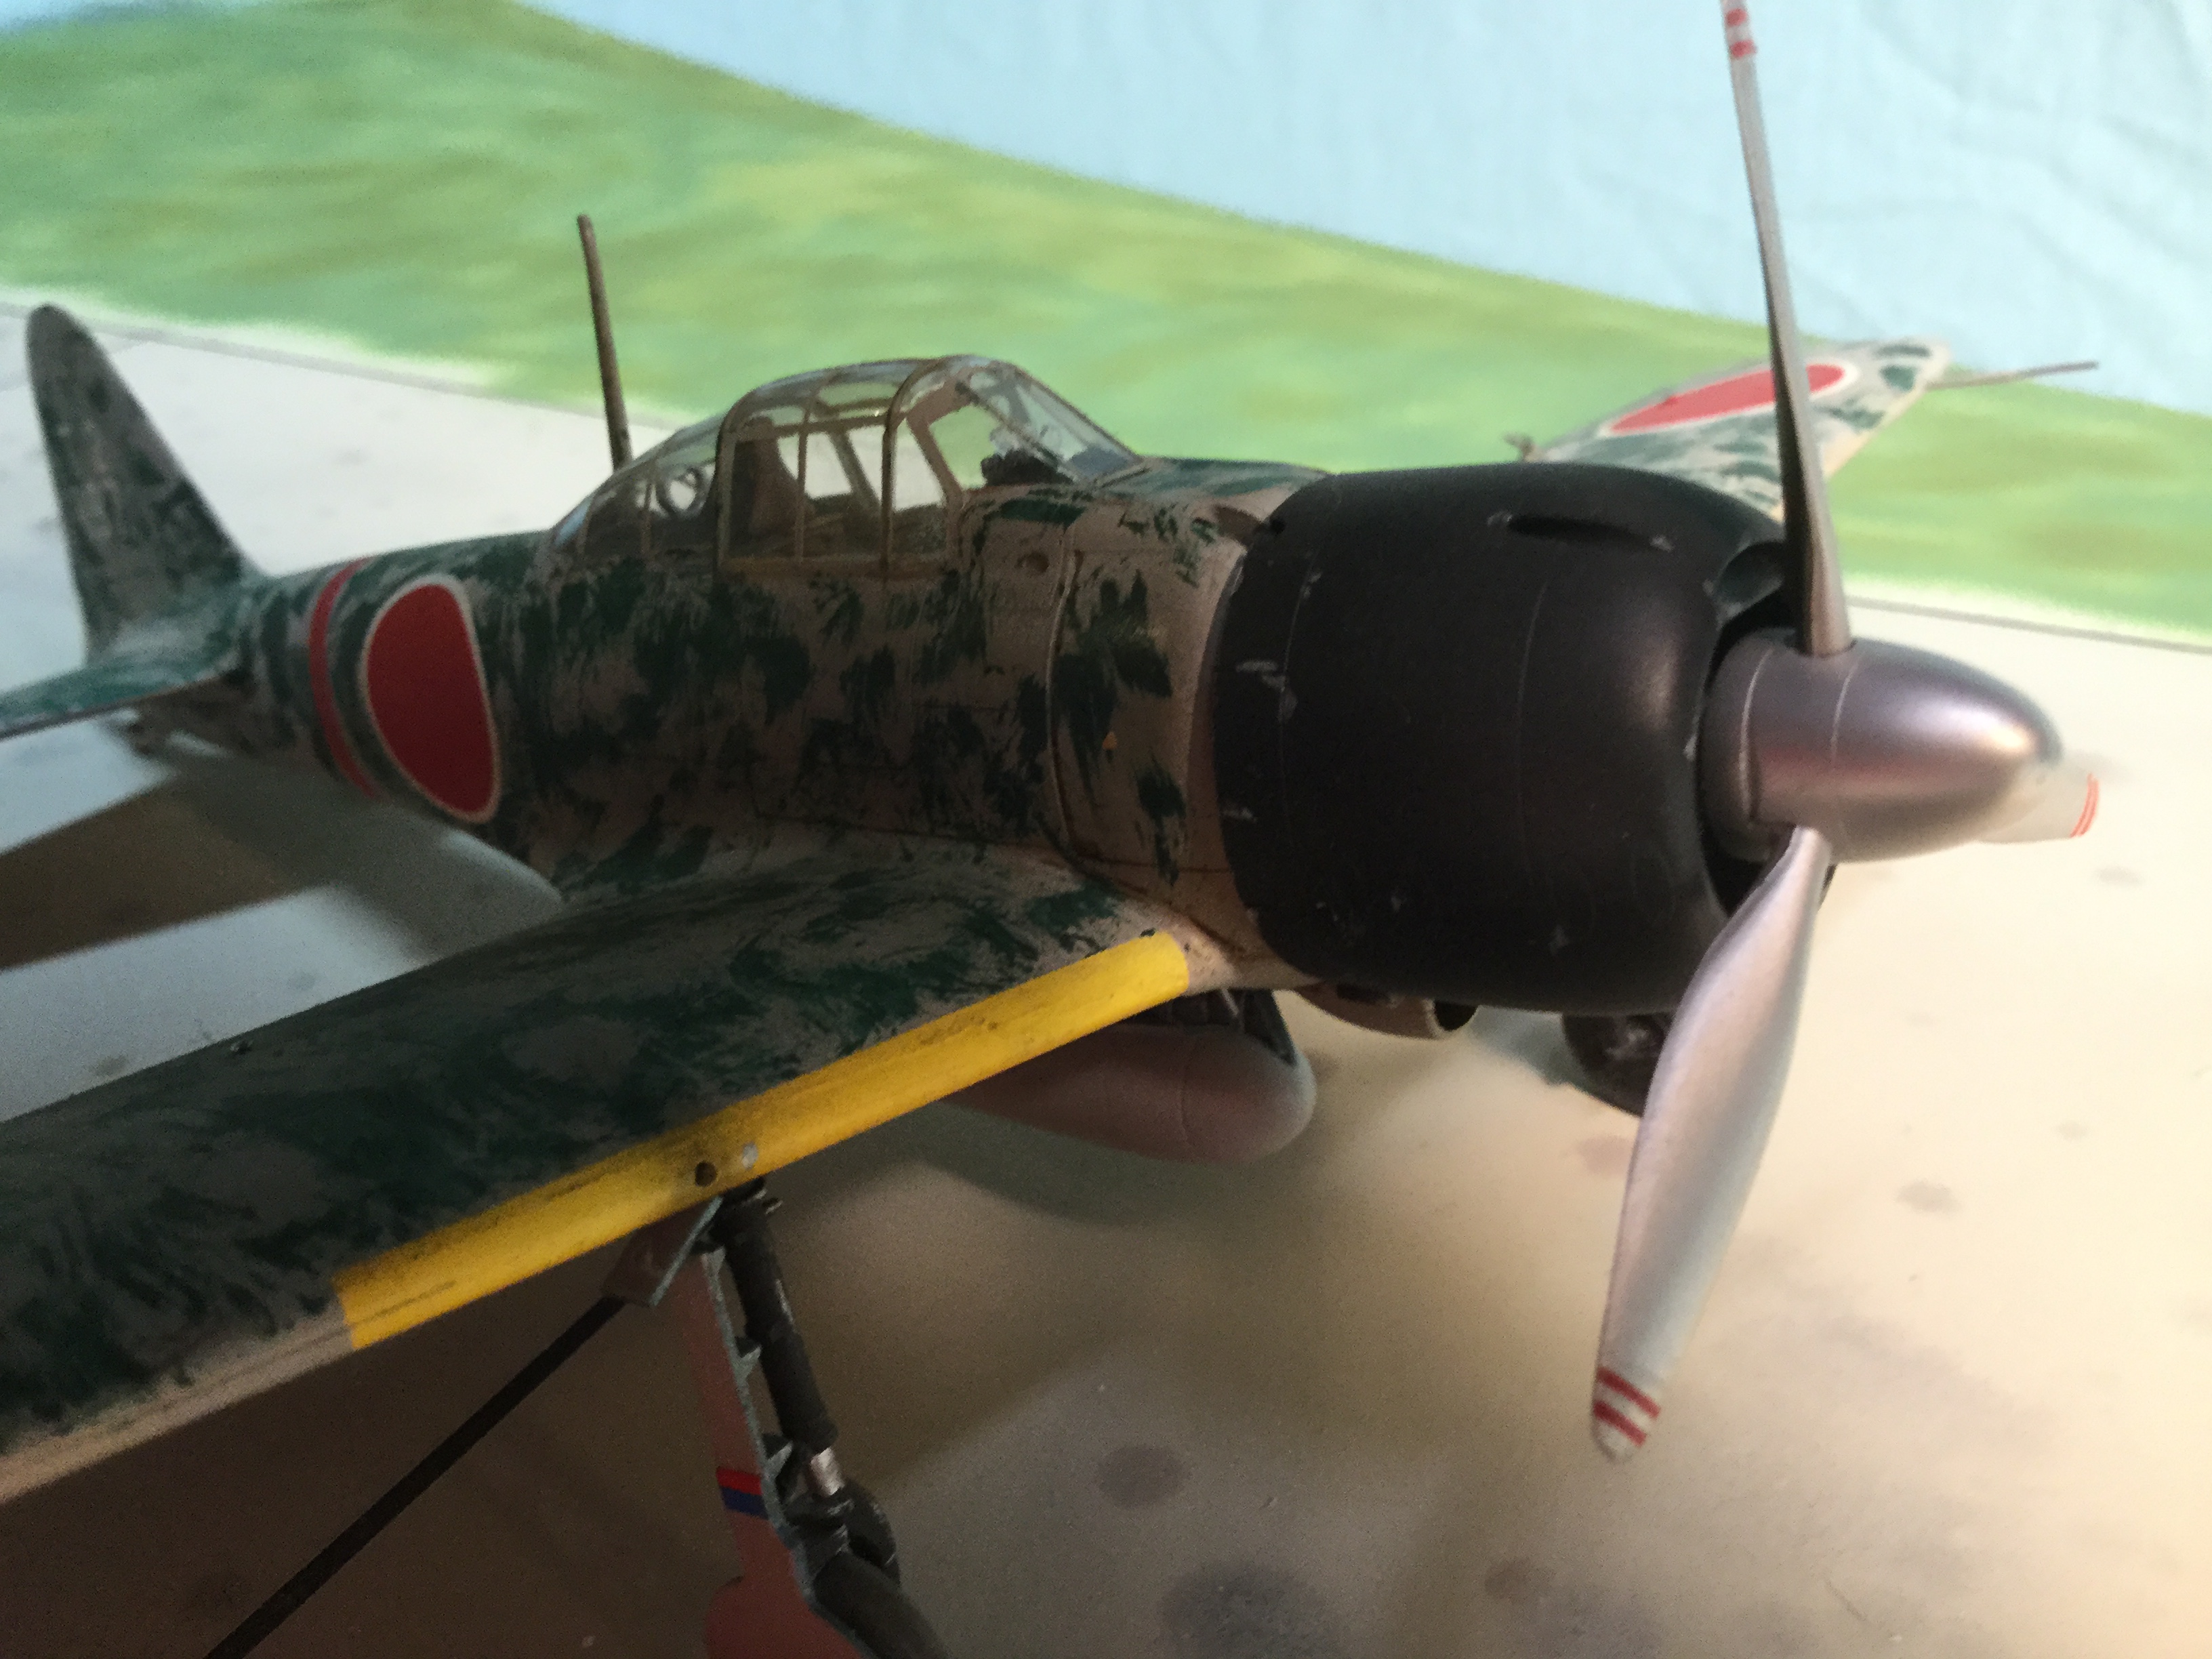
This particular subject is from the Hasegawa kit, but decals were pilfered from an older Tamiya kit. It represents an A6M3 based on Rabaul in early 1943. At this point, most Japanese combat missions were very long range to hit Allied air bases on Guadalcanal or Port Moresby. But the shorter range Hamp could not fly those missions. It could fly tactical missions over the Buna/Gona area on the north coast of New Guinea (where major land campaigns were under way) and was very useful for local air defense. A small number were also deployed forward to small airstrips in the Solomons or New Guinea. But only the older Model 21 Zeros could fly all the way from Rabaul to the major allied bases.

A captured Hamp being test flown in the US.
Like all previous Zeros, this airplane would have been delivered in an overall grey color. But because of increasing pressure from allied air power the Japanese had started applying disruptive colors to the tops of all their planes in the field. In this case, we see a Navy Green color has been mopped over the upper surfaces. This was a lot of fun to apply. I just used an old worn-out brush, and pretended I was dry brushing with a wetter than normal brush! It looks a little garish, but this was probably good camouflage for when it was pushed back under the trees at its base. And for what its worth, I think this jungle camo and the square tips make this a very attractive Zero.
Related Posts
Mitsubishi A6M2 Model 21 Zero
Mitsubishi A6M5c Model 52c Zero

You have done a really beautiful job with that green leaf camouflage. Well done!!
Thank you! It sure was different to do.
Hi, Pretty good job.. it looks like the Japanese add the green camouflage with a brush after a IJA Grey paint was original color..is that the way it was doing?
Best regards
That would be my guess. It might be a rush job with a sprayer of some sort, but my guess is broom or mop!
Reblogged this on My Forgotten Hobby and commented:
Why bothering to build since I can reblog Dave’s posts.
You are very good for my ego Pierre!
Nice camouflage…
Not boring at all Dave.
Just a little typo…
Rabaul instead of Rabual.
Shoot, got it!
Terrific finish Dave. I love the Japanese ‘Jungle’ scheme, it really looks the business. Congratulations on another excellent build, and thank you for an education on the confusing designation system of the Zero. Rich.
I’m glad you liked!
A fabulous model. Love the paint scheme, it’s certainly very different. An interesting explanation of those marks too. All makes life a little easier.
It was hard to try something this different too; the first thought is “it looks bad because it looks so different”.
Which of course is kind of silly. But then so is using mops to paint an airplane.
Thanks for the comment!
My pleasure. This kind of camouflage can be very difficult to replicate – especially well. I think you got it spot on!
This is definitely something difficult to replicate because of scale. In the pacific theater, and especially in some of the more remote theaters, improvisation was a feature. Your recent post on the grabbed out D-Day markings demonstrates that sometimes, they needed to improvise.
I think you did a pretty impressive job, considering the very real scale problems of a paint job in 1/48th.
Thanks Ernie.
There’s a fairly well known photo of another A6M3 (a 22 not a 32!) flown by the ace Nishazawa that has a very similar look. But when you look closely it was apparently crudely sprayed instead of mopped. I hope to build it some day too. But I’ll have to try getting a really fine line with my airbrush. Its always interesting to me the different ways these things were done!
Replicating in scale is always a game I enjoy. I look at this build and see some things I wish I’d done differently; like I skipped my usual post-shading because I didn’t know how to do it over the camo. But now I have an idea to try on that next one (very thinned down light grey).
I am pleased if viewers like the result. But I want to do better!
Enjoyed the read Dave. Gathering information on any Japanese type, particularly given their individuality varying with place and time of manufacture as well as improvisation at locale is always a conjunctive effort of collated sources, of which your article has become one.
As I intend building the same time frame decorated Rabaul based 204th Kokutai A6M3 model 32 in 1/48, a question for you, if you wouldn’t mind? Understand the green disruptive camo over original manufacture IJN grey green (Mitsubishi factory production tone) was improvised ad hoc as loosely interpretated with no strict adherence to set rules in response to an IJN directive of mid ’43. Not disputing the information having noted the italics specifically stating “mopped”, but how or where did you come by this application method information for 204th “Hamps”? I’ve been wondering whether to airbrush replicating spray, hand brush replicating brushed, sponge replicating sponge, and hadn’t considered mopped, which upon reading makes perfect sense considering available ‘tools’ to hand under the circumstances and need.
Just a further thought knowing the desperate logistical resupply situation of the Japanese in PNG and New Britain at the time, but I wonder if the disruptive was applied instead of overall upper green as a pragmatic compromise due to insufficient paint supplies availabile to repaint the entire air group upper surfaces IJN green in accord with the directive, or perhaps no brushes or spray equipment facilitating overall application given that it was ‘mop’ applied? No source for this. Merely common sense reasoning based upon knowledge of the logistical situation.
As well as informative, my compliments on your easy reading interestingly written style.
Availability is certainly a reasonable conclusion. One problem with all this is a lack of really definitive sources; educated guesswork is the best we have in so many cases. Don’t consider my “mopped” judgement authoritative! It’s purely a guess from comparing a particular Hamp photo I had to other improvised schemes (like Nishizawa’s famous model 22). It might have been broomed! Kidding. It sure looks mopped to me, it certainly wasn’t sprayed. I can try to track it down again when I have some time next week (I wish my library had a better search engine!).
Thank you for reading and commenting! That’s what keeps this site fun.
We share perspective and the motivation of historical interest. Like you, the acquisition of knowledge curve is for me, a step by step adventure rather than the destination. Whilst striving for accuracy, I’m not going to lose sleep obsessing over a marginally wrong shade applied discovered later. e.g. Nakajima manuf A6M2 vs Mitsubishi manuf A6M2 IJN grey green tonal variation.
Similar age to you, growing up as we did surrounded by the resonance of WW II, similar fascination. Avation career background, been to many of the locations of those fierce Pacific battles. Buna, Tarawa and Guadalcanal were particularly spiritual and humbling experiences for me. Having lived and flown in the tropics really brings home an appreciation of how admirably resilient that generation was on both sides, and what they really went through that the single visual sense of a newsreel, HBO drama, or limits of imagination the page’s wrtten word can’t fully convey without exposure.
Similarly, having served, experiencing all the pragmatisim and adaptation that occurs in field ops to get the job done, it does’t take any stretch of imagination to come up with the appreciation that that disruptive camo might well have been applied with a mop if that was the only tool to hand. The aviator in me OTOH thinks where not sprayed, it might have been sponge dab or thinned and carefully brush applied for surface smoothness. From experience, Its surprising how little dirt or detritus e.g. bugs, on the leading edge and wing airfoil can reduce performance in an arena where speed and ROC are both critical, neither helped by high density altitudes attributable weather in the tropics. Not like the severe disruption from ice acretion, but can make 10kts difference, and in a turn critical angle is reached at a higher speed thus increasing turn radius.
With the Ki-43 or A6M2 & 3 speed disadvantage vs their typical opponents by late ’43, I would’t like to be down 1kt under max attainable. We always washed our airframes prior to dep for exactly that reason. I think the A6M2 & 3 with their lower rated HP Sakaes might have been more susceptible to perf degradation than liquid cooled P-38s, and the incredibly powerful Corsairs and Hellcats. Reading your other builds and articles as well. I enjoy your style Dave. Cheers.
Biggles/266
Thanks Biggles, and thanks for that perspective! You’ve certainly seen some things I’ve only read about.
I do try to match details, colors, as best I can; but like you said, I try not to sweat them too much! Research and thinking things through is fun, but I’ve seen discussions on other web sites that make my head spin. I hope I find a healthy balance, or at least MY healthy balance.
I did some looking today to find the picture I was thinking of, and no luck.
It was “option 3”, 204th Naval Fighter Group from the old Tamiya Hamp kit; but Tamiya doesn’t list their references. I know I tracked down a photo of it ten years ago (or so) when I built that kit. I looked in mainly my “Zero” references, if its in a battle or campaign reference it will be harder to find.
Thanks for looking. I came across some other original images of Rabaul based A6M2s during the same time frame when researching the other day, and what is immediately apparent/evident although the local order issued by its commander applied to the enture kokutai, is that the ad hoc application of IJN was loosely interpreted and appears to have method and pattern may well have been up to the individual aircraft’s ground crew’s interpretation and variation. Given the need to get it done with offensive operational requirements and maintaining a constant state of readiness, one can well imagine this being the case.
Re Tamiya. I noted they included a colour scheme “option 1”, for their A6M3 Model 32, they list the time of it as 1940 which clearly, isn’t plausible for a “Hamp”. Point being, good in my opinion as these kits are considering how venerable the mould, like the extensive detail in Tamiya’s much costlier more recent mould kits, the instructions of the day were commensurate with the expectations of modellers back then -of which I was one, before the internet, lidar scanning, slide moulding and widespread marketing of aftermarket etch all aimed at the ever more pedantic demanding changing purchasing demographic.
If when I find something more authoritative, I’ll pass it on/share here. I have Tamiya’s A6M3 Model 32 to build in 1/48, and am favouring their “option 3” scheme myself. Very affordable price of the kit facilitates detailing with Eduard’s etch for this kit.
I’ll look forward to seeing your build!
I’ve seen a lot of markings and color guides that are highly suspect. The biggest fubar I’ve ever done was building a Spitfire Mk VIII from an Aeromaster sheet of Aussie Spits that was just wrong in almost every way. It really drove home to me the importance of finding PHOTOS of a subject. And of course most existing photos are black and white. Even when they’re color, things can shift or fade with time. There’s just so much “best guess” in building a model.
Even at museums I’ve seen a few examples of markings/colors that are likely in error. But that’s what keeps this always interesting.