
Interior Assembly, Wash, Dip
I finally started gluing stuff together! Always a big day for a model.
 More of today’s work after the jump.
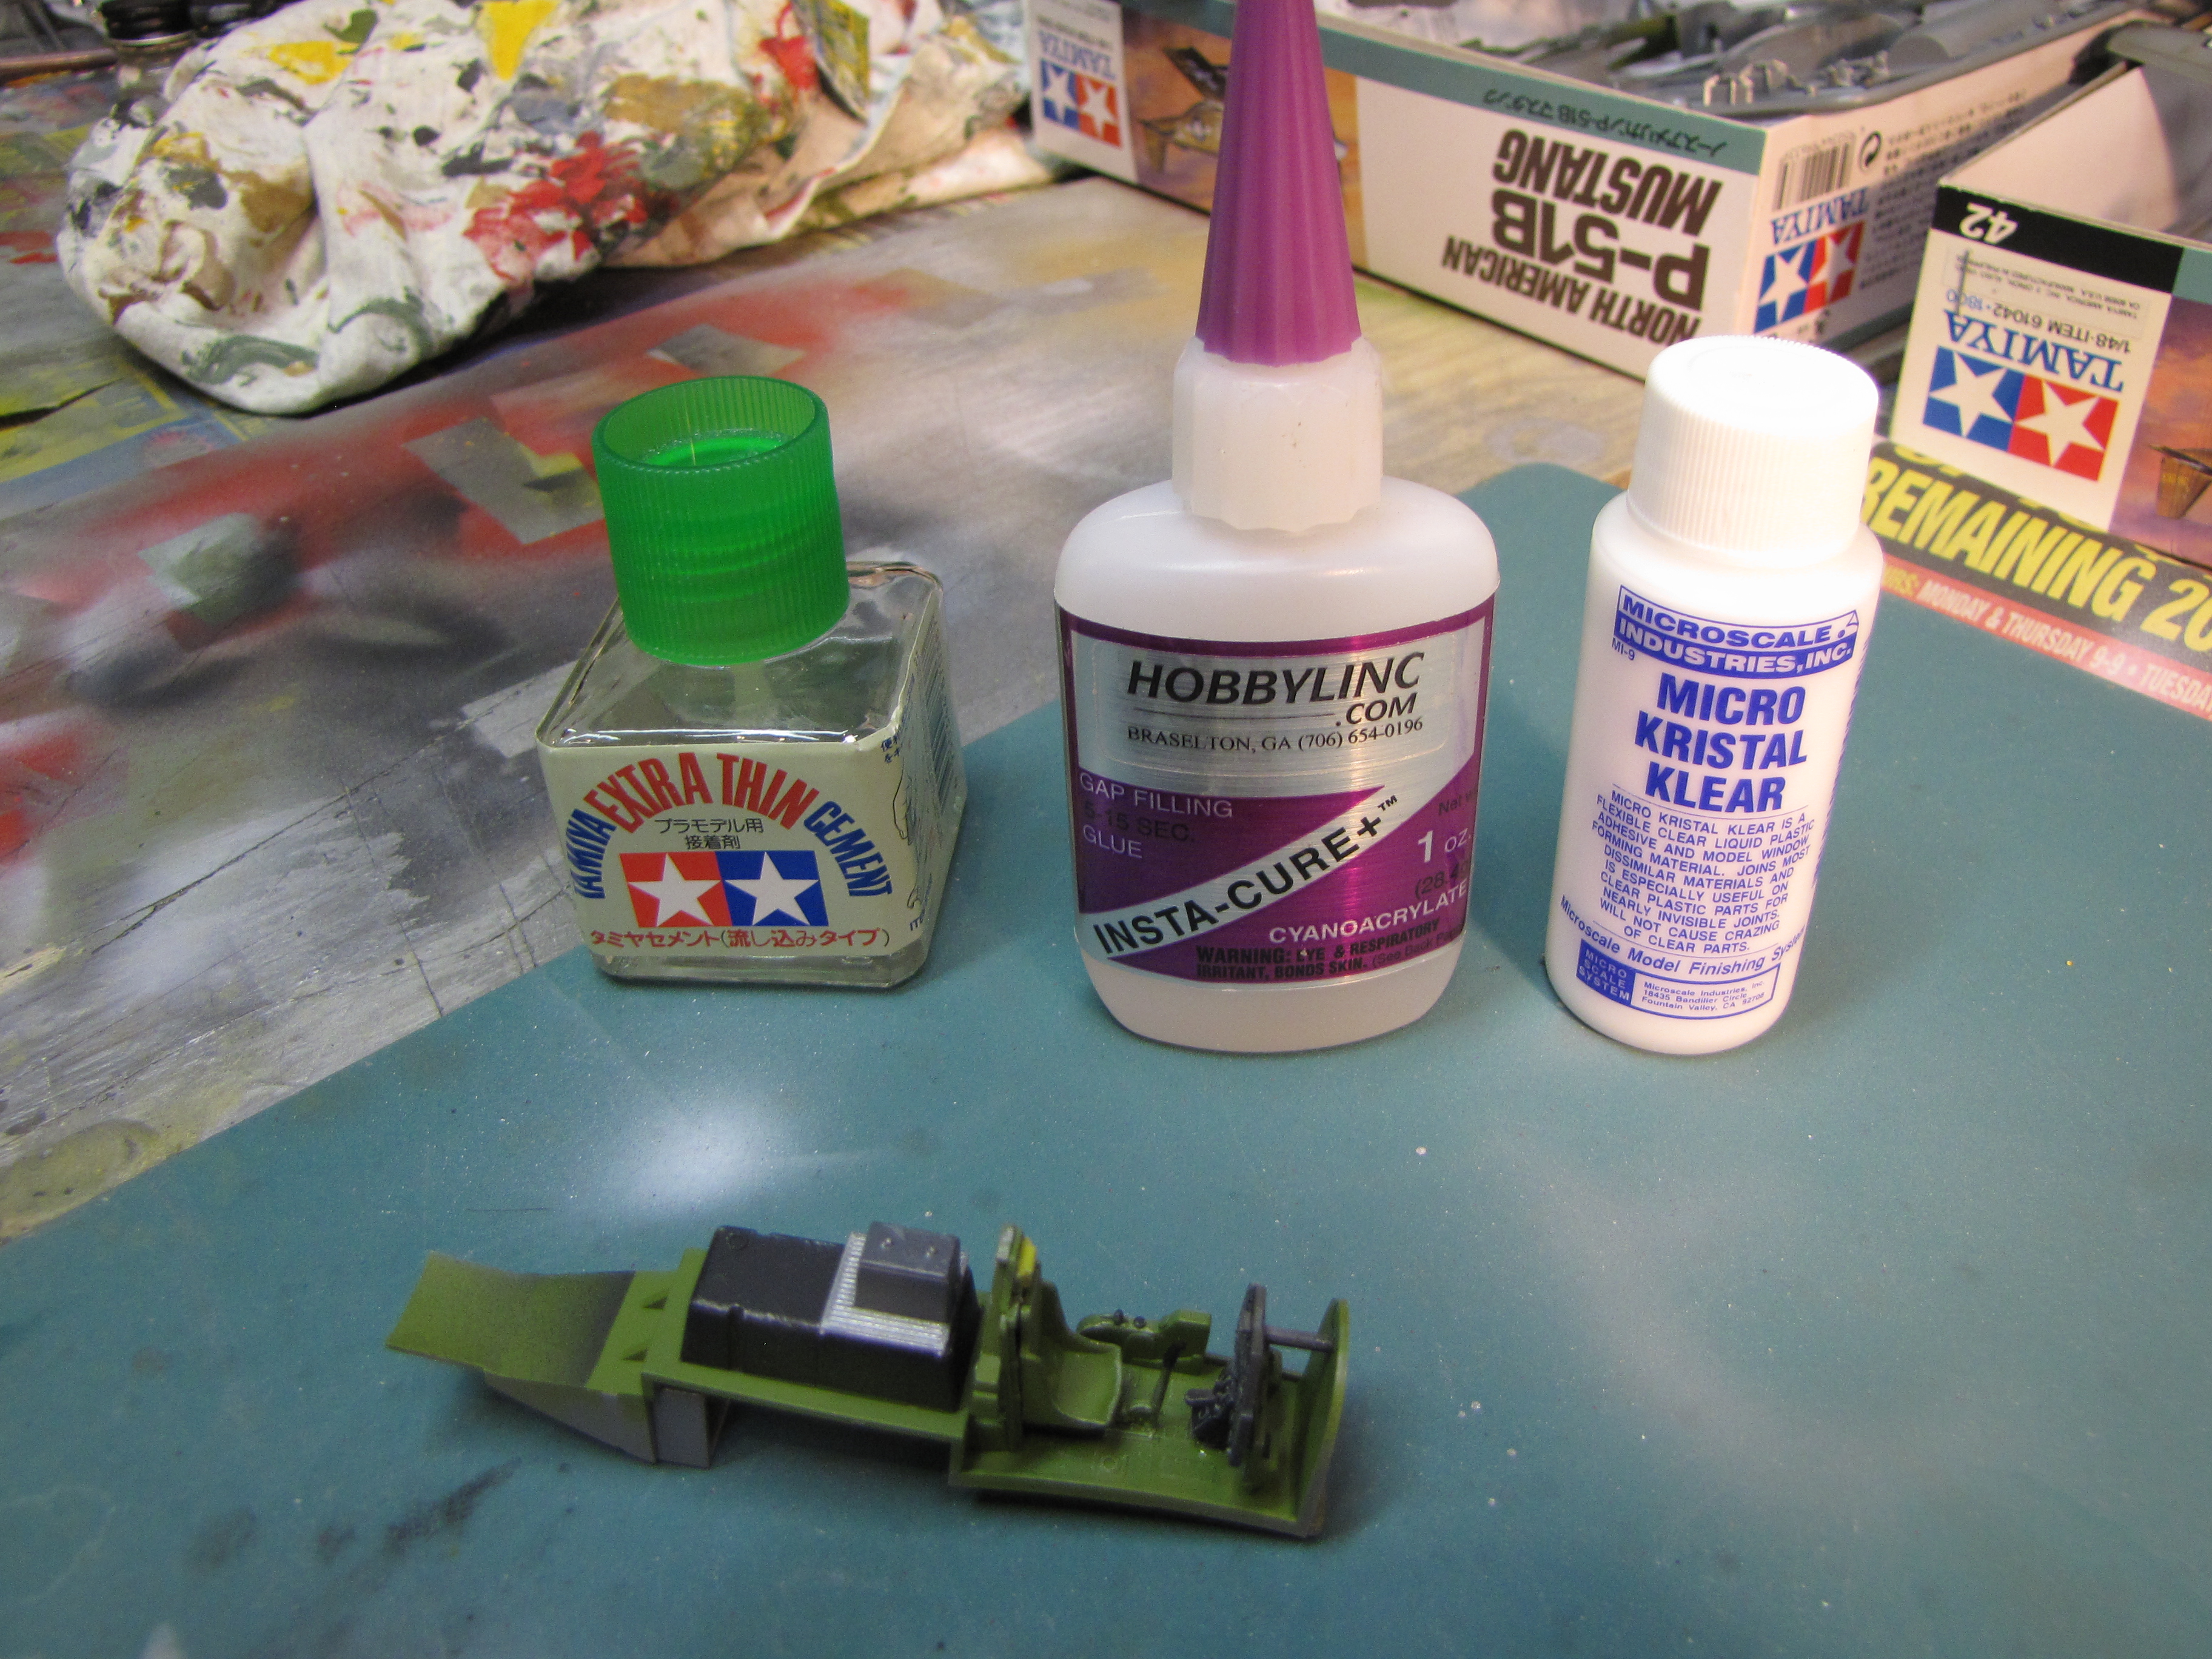
Pictured above is the cockpit assembly, from firewall to radio rack. For this simple build there’s not a whole lot to see here. The glues behind are the three main types I use. The one on the left is plastic cement; its the traditional type that slightly melts the plastic to fuse pieces together. I use it mainly for the big fuselage and wing pieces. Things where it works best to hold the parts together then run the cement into the seam. It sets up quickly and makes a solid join.
The bottle in the middle is a thick CA type glue. This I use for smaller parts (like the entire cockpit assembly here) or anytime I’m gluing non-styrene parts like resin or metal. It dries very hard and strong, which can be a mixed blessing. It dries harder than the plastic, which can make it difficult if it needs to be filed or shaved down afterwards. CA glues are best known under the “Super Glue” brand and were first designed for medical use as a suture replacement; which means they bond flesh instantly. So care is required! But I use a gel-like form that is easier to use than the runny brands.
The last bottle is a white glue, like Elmer’s or a million other brands. This has two great strengths; first, it will never craze plastic. That is hugely important on clear parts. With the other glue types even their fumes will fog a clear part. Basically that means you can’t use those other types on clear parts. The second great thing about white glue is it is usable as a filler in some situations. It is very easy to work with in small cracks and seams (apply with a toothpick, remove excess with a wet cotton swab), it has some bonding strength when it dries (unlike most other putties and fillers) and it dries with the texture of plastic.
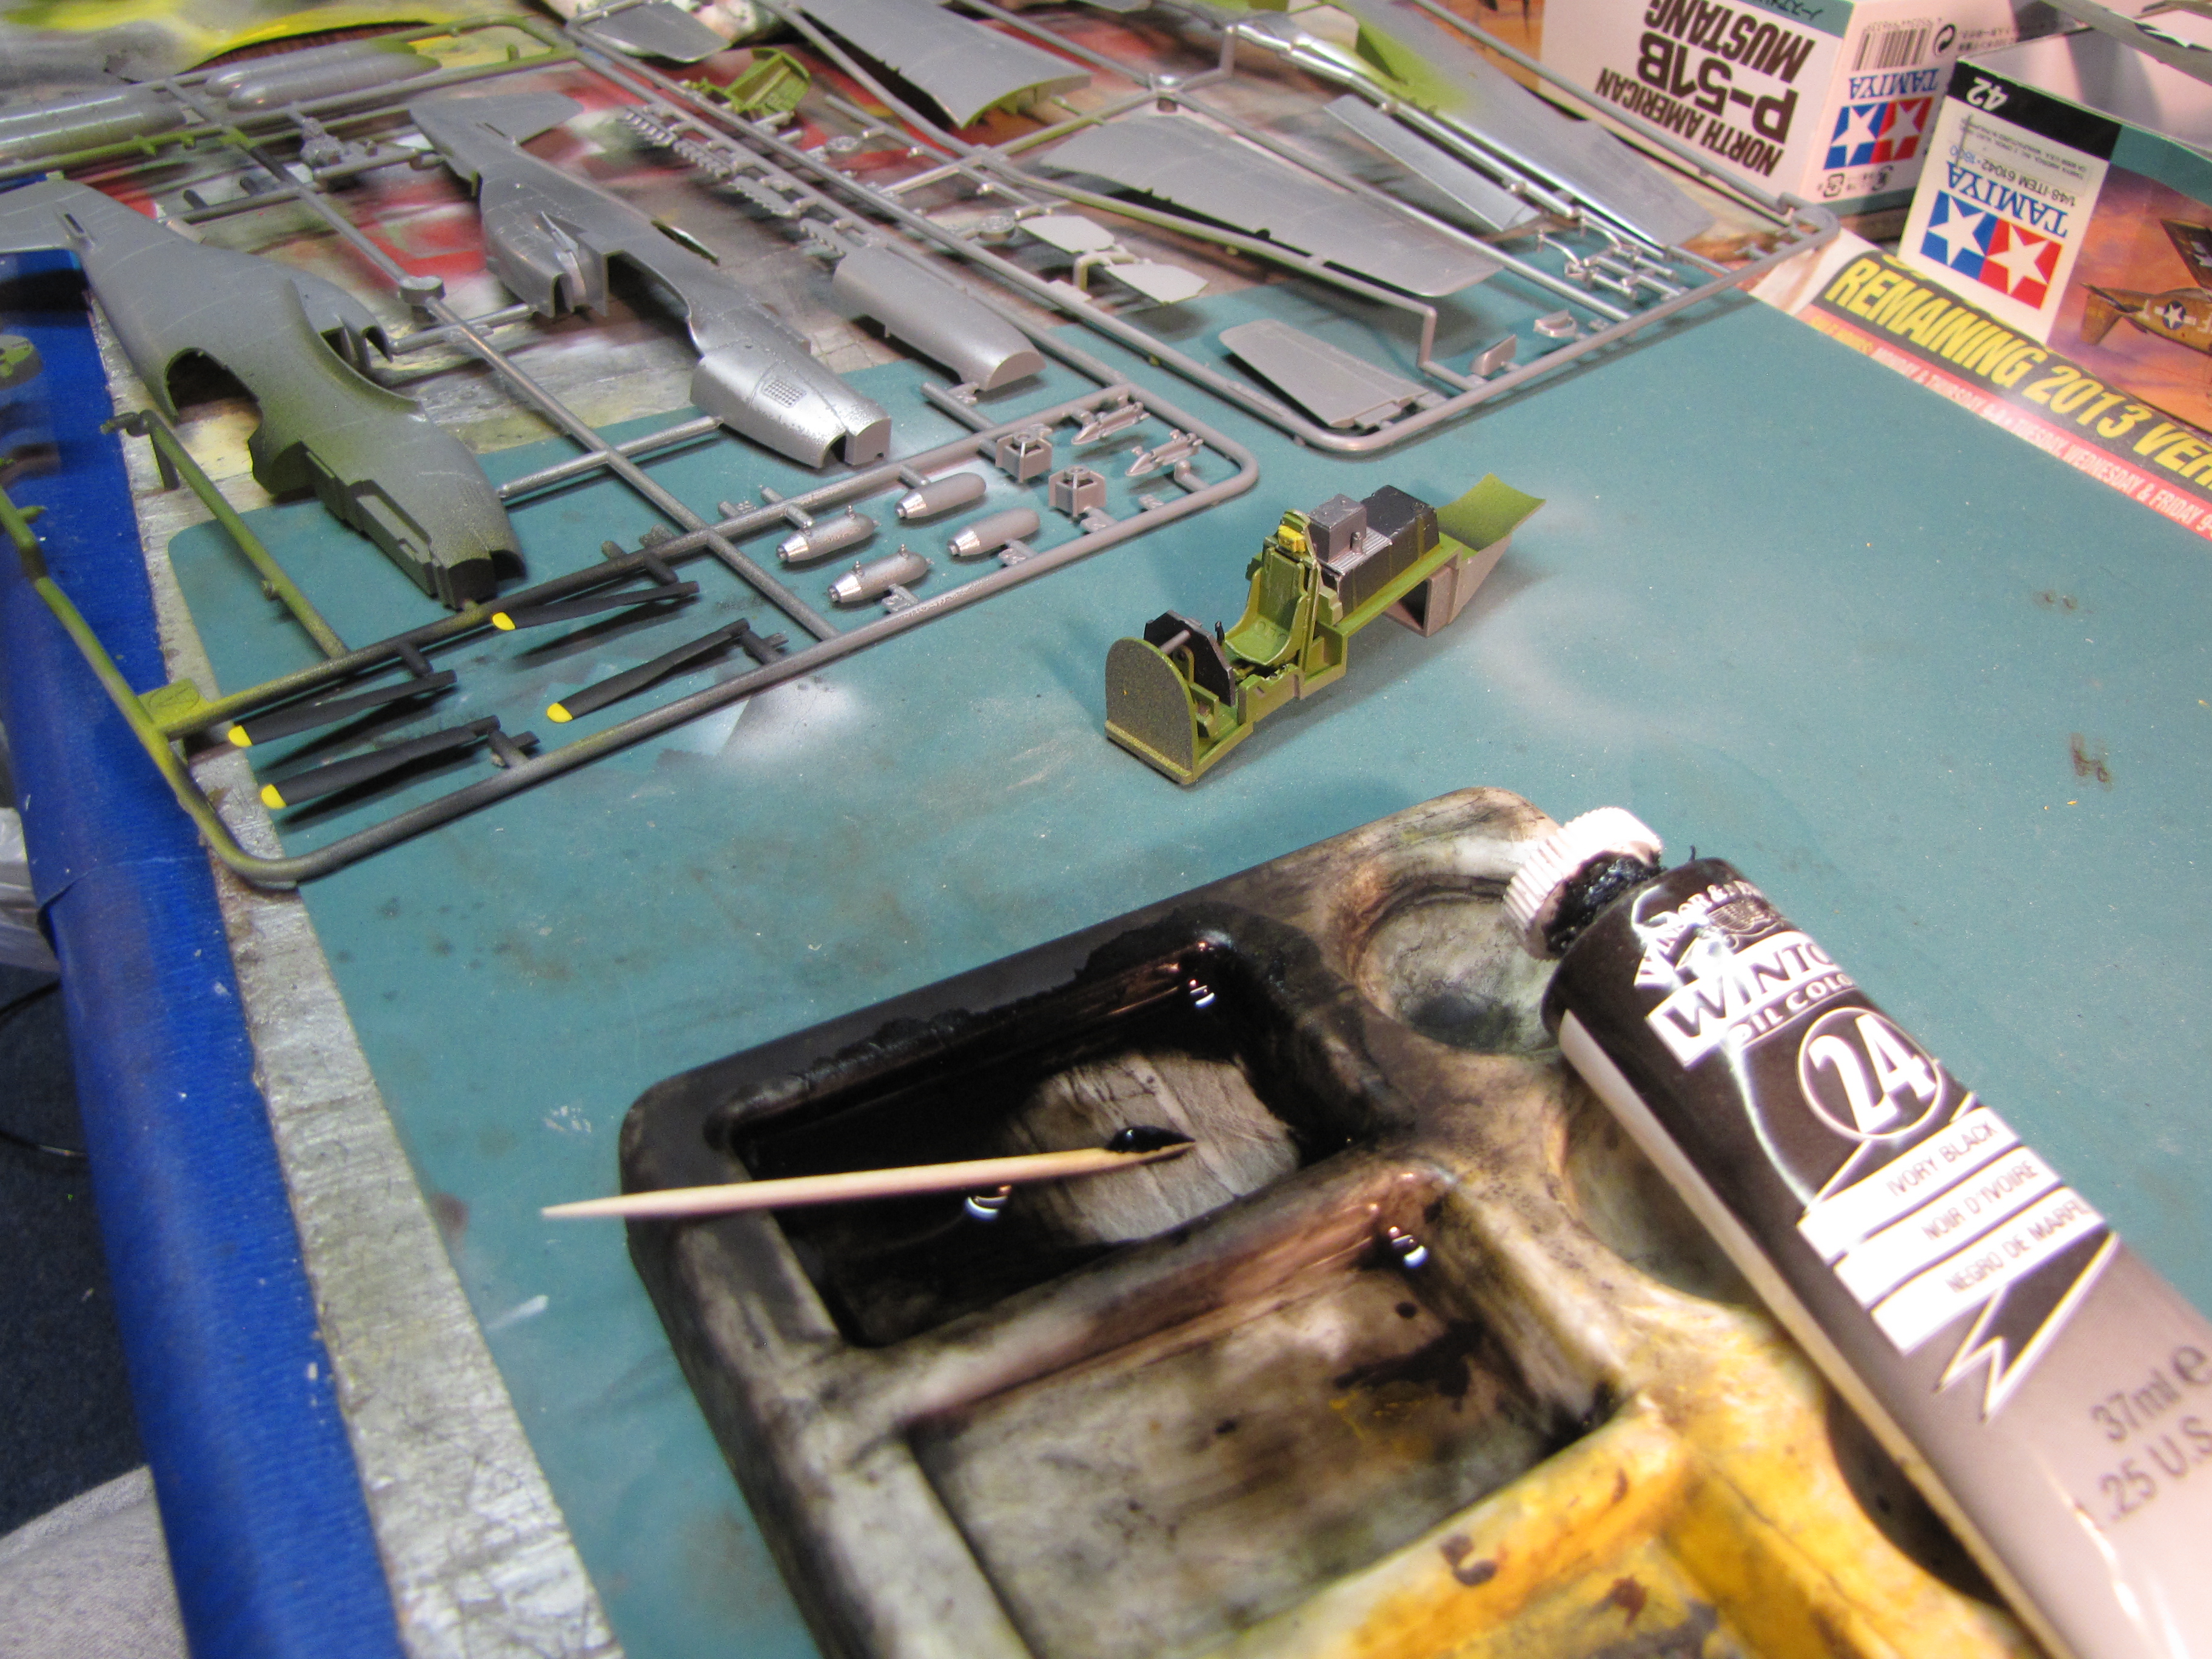
Time for a wash. For this I’m using Winsor & Newton oil paints. I mix up a small amount of Ivory Black into a fairly large amount of oil. This creates a thin black oil that I brush over all interior surfaces (cockpit and landing gear). This the opposite of the dry brushing I did yesterday, the oil will settle into recesses and make the shadowy areas darker. For things that are meant to be really dirty (like if the engine were visible in this build) I mix up a darker wash.
Everything left to dry with oil wash over all.
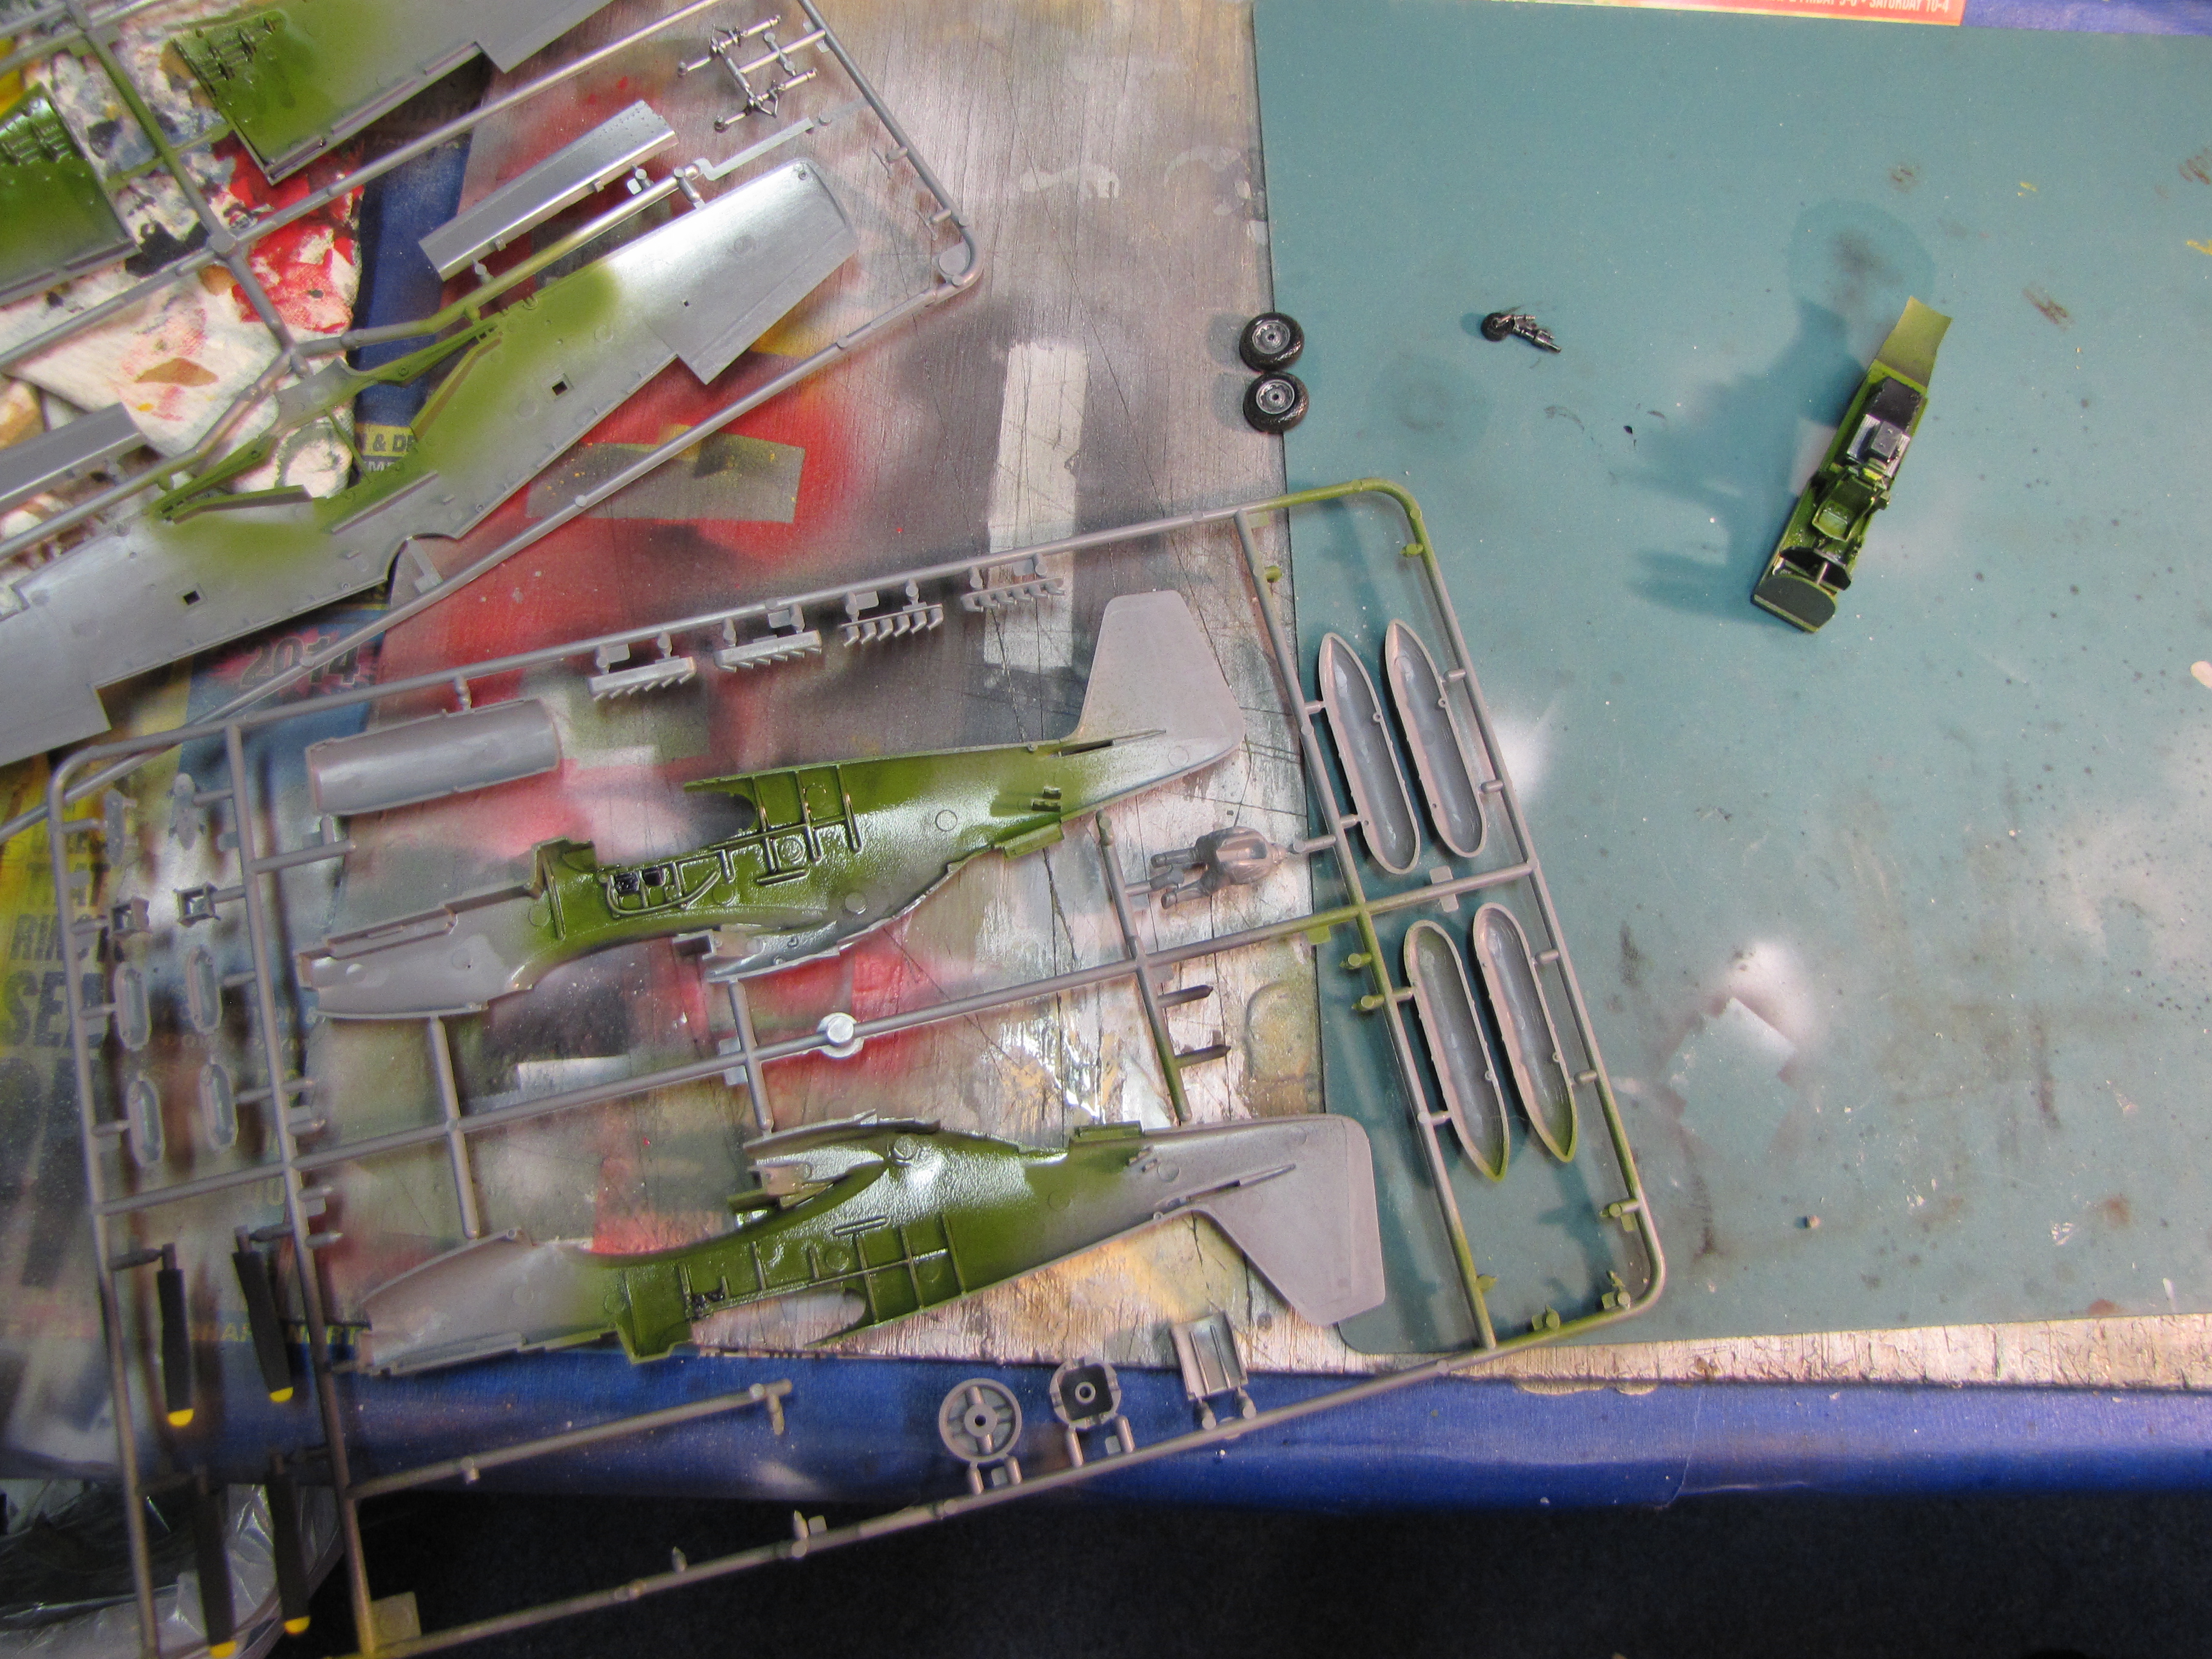
One last thing to do today, I dipped all the clear parts in a jar of Future Floor Polish. Future is a clear acrylic that will actually make things more clear. Sounds impossible but no. It is very thin, and will flow into scuffs and flaws in the plastic surface leaving it better than fresh out of the box. It also provides some protection for those parts from the vapors of the various paints and glues I’m using. It used to amaze me how often clear parts would fog or streak in the weeks after a model was finished. I’ve learned that comes from all the chemicals curing. So I guess one fix could be letting everything sit for a week or two after you’re done before attaching the clear parts. But I don’t like that for a couple reasons; one is just pure impatience to see things done, but the other is I prefer to attach the clear parts before I paint the major body colors so everything will match and blend in together.
